Coming soon: StickyTiki removable wallpaper!

Friday, May 31, 2019

I have lots of ideas for new products for StickyTiki, and there is one I've been doing some work on behind the scenes for some time now. The product we use was designed to be used for large scale wallcoverings, and that is something I've wanted to add for some time now. You hear lots of stories about the grim task of stripping old wallpaper when people are renovating their homes. How great would it be if you could just peel it off, as easily as a StickyTiki wall decal?

With that in mind, and all the possibilities that brings with it, I needed some fabulous repeating patterns that I could use to print onto wallpaper. Because if you've got a product as special as StickyTiki, you need some pretty special designs, right?

Luckily for me I know some very talented illustrators, one of whom had developed quite a penchant for designing patterns. Katherine Quinn who created the artwork for a range of decals for us also has a great range of patterns. Last year I had the opportunity to create a trade booth for an insulation company, so I recommended using a wallpaper to give the stand more interest. This was a good chance to try out my idea, and it worked really well.


The next step was to create a background to photoshop the wallpaper into. I photograph each and every one of my decals, but this isn't so practical for wallpaper! I wanted to avoid using stock imagery if I could, so I spoke to the lovely Kiri at Junk & Disorderly, and she arranged it so I could come in and photograph some of their gorgeous furniture against a blank wall, so I could use that for a background.


The next step will be to setup the mockups for the different designs, work out all the finer details and then launch them! Hopefully I will get that done over the next few months and then you will be able to buy your very own StickyTiki wallpaper.

Making our packaging more sustainable

Friday, May 24, 2019

Plastic bags – something the world does not need any more of!

You'd think that with all this talk about using less plastic in our lives, there would be lots of great alternatives out there. In lots of cases there are of course (think how ubiquitous reusable coffee cups have become), but sometimes the simplest things are the most difficult to find. Recently I was coming close to the end of my supply of small, plastic prepaid courier satchels. The company I was using already had a larger size available in a nice sturdy cardboard envelope. This was great, as not only was it more environmentally friendly – it could be easily recycled, and was made from recycled paper – but it worked better for my decals as it was more sturdy.

I had seen the smaller size in a cardboard envelope from another company, and thought that it wouldn't be difficult to find a suitable replacement. This turned out to be a very optimistic outlook. The current company didn't have any plans to add the size I required to the cardboard range. The other company wasn't even aware that they had made them, as they were no longer available. At this point, the notion of buying a prepaid cardboard satchel in this size was dashed.

Another option that had been suggested to me was buying cardboard envelopes and printing my own courier labels. This also turned out to be easier said than done, as it involved buying a special printer and wasn't really aimed at smaller businesses like mine. Then I had another company recommended to me that could do everything I needed, and I could print the labels on my existing printer. So I was finally able to remove the last plastic packaging option I had for posting, and move entirely to cardboard! I am quite a fan of cardboard, so this made me very happy. Not only is it recyclable, it is such a versatile product.

The new. entirely cardboard range of packing options for sending out your decals

Now I just need to find a biodegradable alternative to the plastic sleeves I use for the medium and large decals. I use biodegradable cellophane bags for the tiny and small decals, but they don't make them in the larger sizes as well. I am still looking, and rest assured when I do find a suitable alternative I will make the switch.


If you'd like to keep up to date, you can now easily follow my blog with Bloglovin. If you don't already have an account you can easily set one up, and if you do, you can now easily add it to your follow list.

The first stage of creating a new decal design

Friday, May 17, 2019


To begin with, the decals start out with an idea. Some of those ideas have been swirling around for a long time. I still have ideas from when I was planning to buy StickyTiki that haven't come to fruition yet! So it is very exciting each time I do get to sit down and start work on a new idea. 


Firstly I sketch out some roughs to get a feel for how the work might look. Usually this will start with some pencil sketches from reference images, and then some rough paintings to try out different techniques until I get the desired effect. In this case I practiced the letter forms with my brush pen before using watercolour and a brush.


Once I'm happy with that, I sketch the outline. If it's something geometric, I literally go old school and use my compass and other tech drawing equipment I used at school. I'd like to add that computers were around then, they just weren't quite as sophisticated as they are now. The internet was still a novelty, not a way of life!


Then comes the fun bit where I get out the paint and create the finished painting. Often I'm happy with the first one, but sometimes I have to try again to get it to a stage that I'm happy with. If my high school art teacher is reading this, I have moved on from my perfectionist tendencies from fifth form. When I saw her at a recent school reunion, she wasn't convinced that was possible. It might be because she hadn't met my second art teacher, Maree from Art and Company who taught me to be more loose and go with the flow.


Once that is done, I scan the original artwork to my computer, make any necessary adjustments in photoshop (usually just to the brightness or colour balance), then I add the cutlines and arrange them on a sheet ready to be printed.


I hope you enjoyed this behind the scenes look at how I create the artwork for the decals. If you click on they photos, they link through to the finish product, so you can see how they turned out.

Follow my blog with Bloglovin

52 weeks of blogging

Friday, May 10, 2019

This blog has been rather neglected in recent years, so I've decided to give it a dust off and see if I can keep up a regular posting schedule. The idea of thinking what to write each week was a bit daunting to start with, but then I remembered I used to write quite regularly on my other blog, Rose in Thorns, and Kim used to write on this blog very regularly in the early days. So I know it can be done!

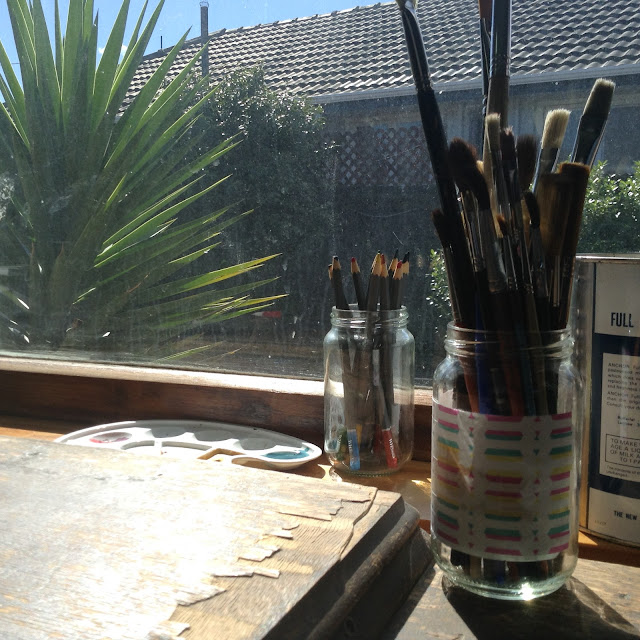
My sunny spot for creating art – my grandmother's old singer sewing machine table

What will I write about? How about a little about me to begin with! (If you want to read more, check out the introductory post I wrote a couple of years ago.) I've always been creative which isn't that surprising, with a mother that is a very talented craftswoman, and my grandmothers were also quite handy with crafts and both enjoyed painting. As a girl I enjoyed drawing and painting and making creations out of cardboard boxes. The latter is a talent my son seems to have inherited! This led to a career as a graphic designer, and eventually to becoming the owner of StickyTiki.

Creating art! The first in my range of NZ bird watercolour designs

One of the reasons I purchased StickyTiki was that I wanted to incorporate more drawing and painting back into my life. After almost five years, I have to say that's still a lot easier said than done, but I am getting better at making time to create. I have started on a range of New Zealand birds in watercolour which has been really run to see a style evolve. I had no idea what they would look like when I started, and I still don't know what the next one is going to look like when I start it.

So in the coming weeks I'll be posting some behind the scenes updates, interviews with the talented artists I collaborate with (here are some profiles I've already done on Drawer Full of Giants, Angelique Monaghan and Shireen Myers), stockist profiles and updates on where you can find me.

I'm looking forward to seeing where this journey takes me, and I hope you'll come along for the ride!
by mlekoshi